Showing posts with label chocolate. Show all posts

Friday, February 6, 2015

A good movie, a bad memory and a great cake

I went to the cinema to see The Theory of Everything last weekend. It’s the story of a young woman who falls in love with a young Stephen Hawking and the struggles she faces as they build a relationship, a family and a life together as his body deteriorates and eventually gives way to severe disability.

The two central performances are wonderful and this film is enormously affecting on a personal level. So, I’d recommend that you see it. But I’m not really here to give a film review. I’m here to write about a scene in the film that brought back memories of one of the worst times in my life with MS.

Most of you will know that Stephen Hawking has motor neuron disease, a disease of the central nervous system that leads to progressive disability and ultimately to death. Early in the movie, when he is being tested prior to his diagnosis, he is asked to do a simple task – to touch the thumb of his right hand to each of the fingers on that same hand.

Eddie Redmayne (who plays Hawking) is so convincing at portraying the confusion he feels when he realises he can’t do this.  Later, there’s a look of sheer anguish on his face as he tries to do it again at home. He suddenly understands he can no longer bid his body to do as he wishes. He’s losing control of his physical self.

My stomach churned as I watched this scene and I can feel it churning still. It could have been a scene from my life because my neurologist asked me to complete that same task before I was diagnosed with MS (I suppose it’s a standard diagnostic tool) and I remember the sense of shock I felt when I wasn’t able to do it. Although my brain was thinking the thoughts that had always previously resulted in moving my fingers, I couldn’t make them meet my thumb. My disbelieving eyes saw them miss every time. Despite trying over and over and over again, I couldn’t get them to do what I wanted.

This persisted for the six weeks that the attack lasted. At random moments of every day, I would try to complete the task again only to have my heart sink when I saw that I still wasn’t able to do it.

However, I did eventually recover and was once again able to make my fingers and thumbs do exactly what I asked of them. But I have never forgotten how frightened I felt when I lost control of my body. Sometimes, when I’m sitting at the dinner table or watching TV or being driven in a car, I absentmindedly find myself touching my fingers to my thumb, as if subconsciously reassuring myself that all is still well – that I am still well.

And so far, I have been.

I attribute my continued good health to my diet. And whenever I feel tempted to eat butter, cream and chocolate, I remind myself what it felt like not to be able to use my right hand properly.
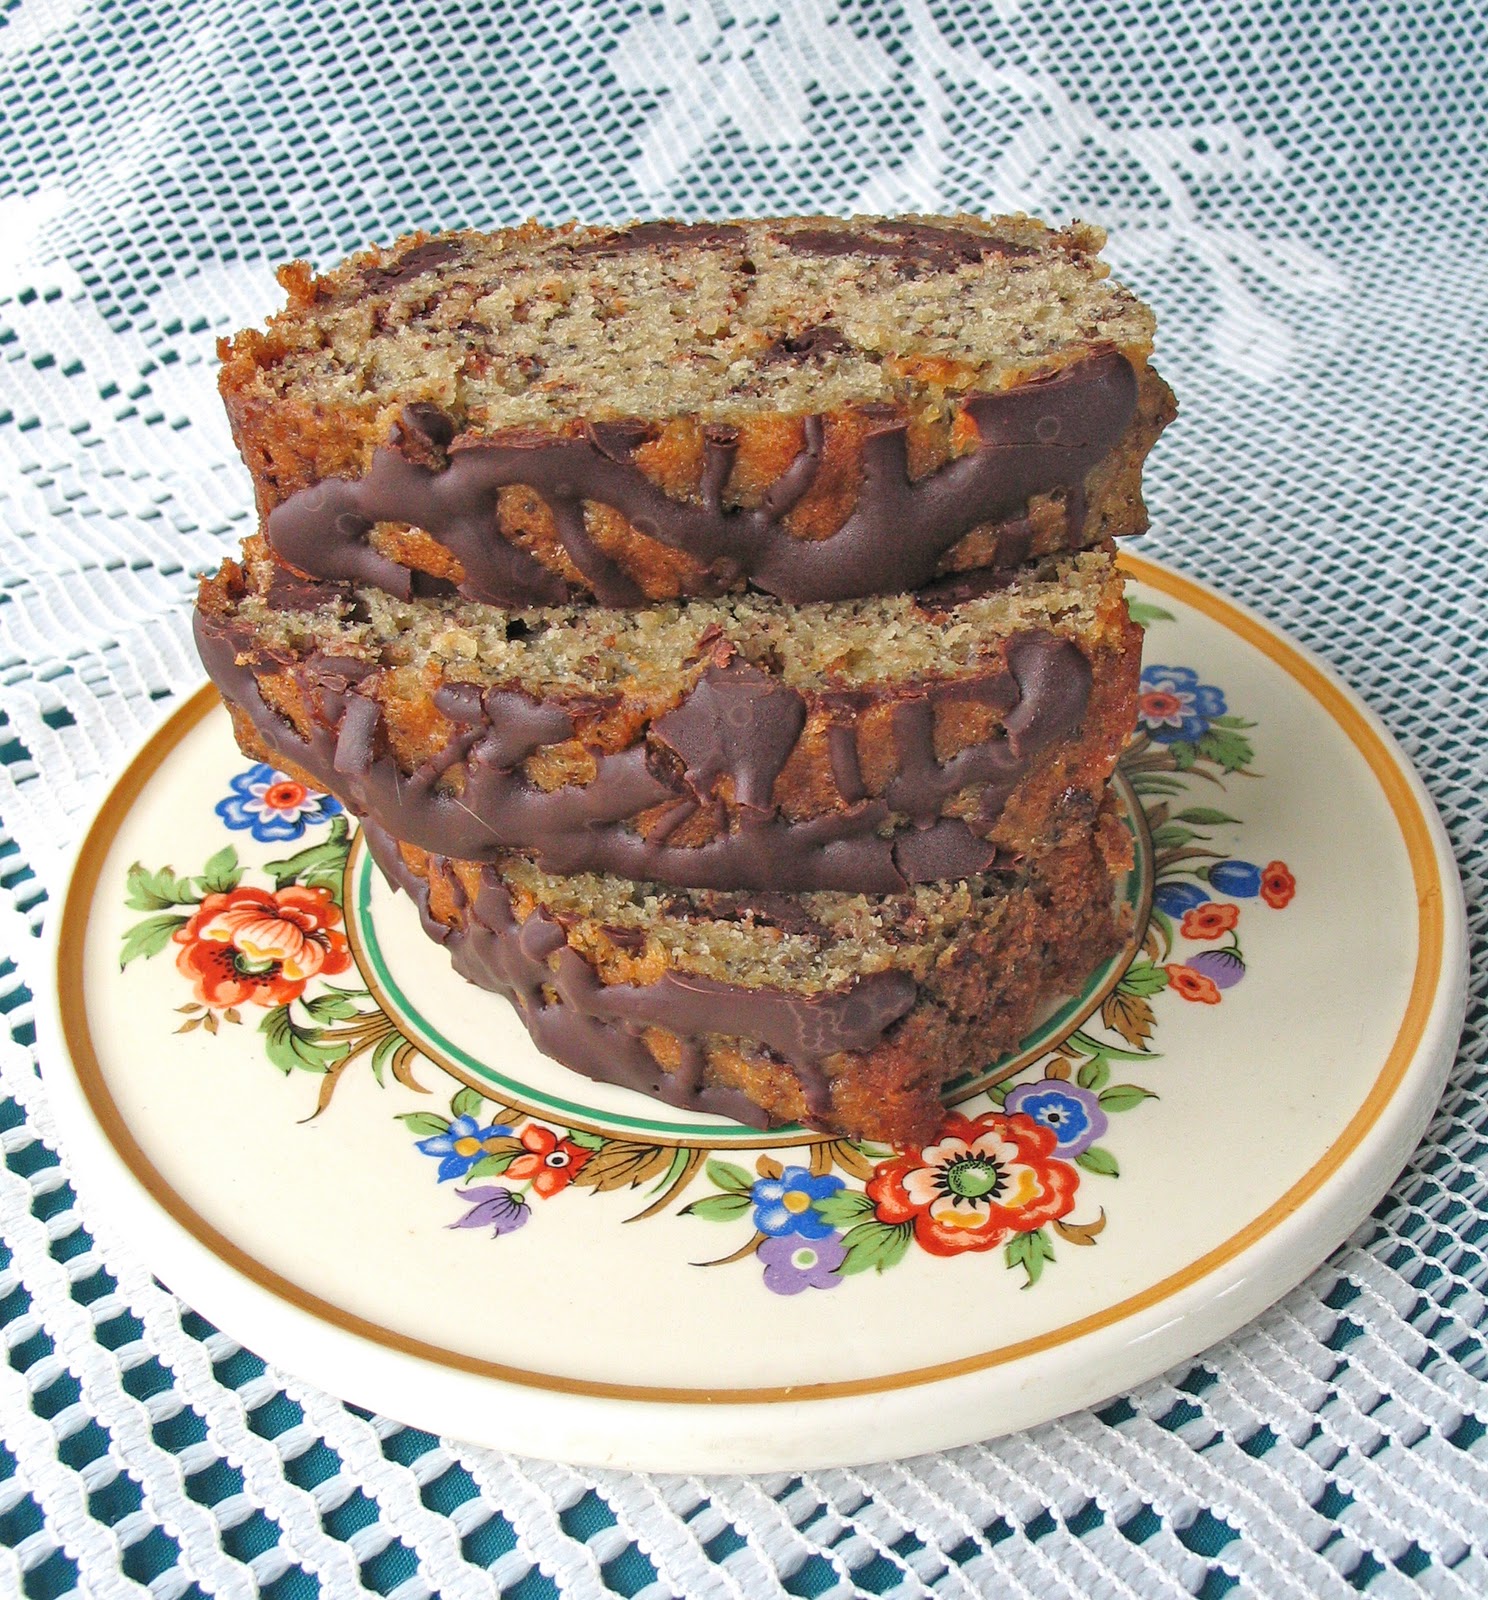
I used to have to remind myself of this quite often, especially when I would think of Mary Berry's banana bread - which was once my go-to banana bread in the café and at home. 
But I don't have to control myself with such mind games anymore - at least not when it comes to banana bread. I've come up with a recipe that is not the same as Mary Berry's but it's just as delicious and it packs a much bigger nutritional punch.


I thought I'd share it with you today.
200g mashed ripe bananas* (this will require two to three bananas, depending on their size)
1 tablespoon almond milk
50g olive oil (choose one with a mild flavour)
25g cocoa powder
50g plain flour
1/2 teaspoon baking powder
1/2 teaspoon baking soda
75g sugar
60g walnuts, chopped 
20g banana chips, chopped (optional)
3 tablespoons cocoa nibs (optional - especially if you are strict about OMS)
1 egg

  • Preheat your oven to 170 C/340 F.
  • Line a small loaf tin with some baking parchment. I find that the easiest way of doing this is rubbing a left-over butter wrapper over the inside of the tin, scrunching the parchment into a ball with my hands and then using my fingers to shape the parchment to the bottom and sides of the tin. The scrunched-up nature of the paper makes it much more pliable.
  • Combine all of your ingredients in a bowl and mix thoroughly.
  • Pour into the lined tin and place in the centre of your oven.
  • Cook for 30 to 35 minutes or until a skewer comes out clean.
Enjoy the cake with a cup of tea (and if you can, go to see the movie!)

* There's no such thing as over-ripe bananas. The blacker they are, the better they will be for baking, producing super-moist cakes.


Sunday, March 3, 2013

Comfort eating on a Sunday afternoon: chocolate, cheesecake and raspberry brownies

I'm finding it hard to stay positive these days. Everywhere I look and listen, it seems as though the cost of living is creeping ever higher while people are struggling to make do with falling incomes. It worries me that I'm about to open the café for a second season at a time when people's discretionary spending has never been so limited.

When I feel anxious or pessimistic, I often turn to food for comfort. Food is great like that, isn't it?  Sometimes, all you need when you're feeling under the weather is a bowl of broth that is brimful of vegetables while (on the - ahem! - completely other end of the healthy spectrum) a serving of this decadent treat can make you believe that all is indeed well with the world.

Chocolate, cheesecake and raspberry brownies - an edible way of putting the world to rights!
At first glance, this recipe may scare you. I'll admit that there's a lot of sugar in it but this brownie is so rich that you'll only eat a little of it at any one time so you needn't feel too guilty (and I needn't worry about giving you all diabetes!)

Brownie recipe:
225g unsalted butter
100g chocolate (I use 75g of 70% chocolate and 25g good milk chocolate)
75g cocoa powder
450g caster sugar
4 eggs
A pinch of salt
100g self raising flour

Cheesecake recipe:
225g cream cheese
100g caster sugar
1 egg
3 tablespoons of flour

100g raspberries
  • Line a brownie tin with parchment paper and set the oven to 180 C/350F.
  • Melt the butter, chocolate and cocoa powder in a pan over a medium heat, stirring well to combine.
  • Beat the sugar and the eggs along with a pinch of salt until light and airy.
  • Add the chocolate mixture and beat to combine.
  • Fold in the flour.
  • Make the cheesecake by mixing all of the ingredients together until well combined.
  • Pour 3/4 of the brownie mixture into your brownie tin. 
  • Pour the cheesecake mixture over that.
  • Add the remaining brownie mixture.
  • Using a skewer, swirl both mixtures together to create a pretty marbled effect.
  • Scatter the raspberries on top, pressing them down into the mixture a little so that they don't dry out too much or burn while cooking.
  • Bake in the oven for 40 to 45 minutes.  The mixture should look something like this and an inserted skewer should come out wet but not sticky.
  • Allow to cool and cut into small slices. I cut mine into 24 slices. 
Make yourself a cup of tea and give yourself time to savour this special treat. Chocolate, cheesecake and raspberries; there could surely be no better comfort in these financially tough times.

Tuesday, February 28, 2012

Proof once again that chocolate will always make things better

Last week was a tough week. Things went wrong. Things fell through. And at one stage, a chimney almost fell off - but I don't even want to go there and, believe me, neither do you!

Some of you may think I'm mad but I've been trying to coordinate setting up a café with my other full-time work. This means that the past few weeks have consisted of me constantly switching from journalist mode to teacher mode to hassled-person-trying-to-set-up-a-café mode. Mostly, I've been doing fine, though there have been times when I've forgotten just who I'm supposed to be...

That was until last Thursday. I'd been in Tralee on Wednesday, where I'd found tablecloths I liked. This was a huge step forward as I'd spent ages searching in Dublin, Limerick and Dingle. But when I called the shop early on Thursday morning to finalise the order, they hit me with a bombshell. They didn't have enough fabric and the pattern had been discontinued so they couldn't order in any more. Back to the drawing board went a VERY disheartened Sharon.


Barely a second after that phone call, there was the chimney incident (the less said about that, the better) and another phone call from my landlord with more bad news.


Feeling really discouraged by now, I then had to go and teach a computer literacy class to a group of pensioners. The computers were playing up and it took at least 40 minutes to get started, by which time my normally lovely pensioners were very crotchety.


Things got even worse after that but I can feel my blood pressure rising as I write so perhaps it's just best for me to say that by Friday, I had made little or no progress with the café and expected little from the weekend.


Needing some serious cheering up, I found myself browsing through Short and Sweet by Dan Lepard, one of the cookbooks I got this Christmas and a treasure trove of baking treats. I found a recipe for chocolate custard muffins and by their very name alone, I knew they were what I needed.


Note to readers: before you get too excited, the name refers to the cooking method. There is no chocolate custard inside. But this doesn't make them any less delicious. These muffins are moist, chocolately and more-ish. One will most definitely not be enough.
Note to self: must make chocolate muffins with chocolate custard inside.

You'll find Dan's recipe for the muffins on the Guardian website here. He's a regular contributor of theirs and I warn you that if you browse his recipes, you'll definitely end up wanting his book! 
While the muffins were baking in the oven and cooling afterwards, I made Dan's treacle chocolate fudge icing to go on top. 

Halve the measurements he uses and you'll have enough to swirl on top of 12 muffins as well as some left over to use as chocolate spread afterwards. It keeps very well in the fridge.


I felt so much better after baking and eating these that my weekend seemed to flow from there. My boyfriend, two of my sisters and one of their boyfriends came to help me get started with painting on Saturday. One of them even had lots of tablecloth samples for me and I found one that was better than my original choice. (Hooray!)


We made much more progress than I ever thought we would and I am so thankful to them all for helping me and lifting me out of what was becoming a dark and pessimistic mood.

I feel I should thank these muffins too. The very act of baking them and the pleasure of eating them made me remember just what I'm trying to do with this café. There will be obstacles to overcome along the way but if delicious food like this is the result, I feel that it will be worth it.


My helpers enjoyed eating the muffins too!

I'll definitely be making these again. They may even feature on the menu of my café. If they made me feel better and made a success of a weekend that I thought would be a total failure, they must be good.


Monday, January 16, 2012

The Great British Bake Off: how does Sharon measure up?

Some of you will already know that I have a stall at Dingle Farmers' Market where I sell cupcakes and other baked sweet treats. You'll know that I bake regularly and enjoy it. However, I wouldn't go so far as to say that I'm a baker. I've never taken a single class in baking (apart from the classes in home economics we had at school, where I am embarrassed to say that I never showed much promise - sorry teach!). Everything I know about baking, I've learned from books and from simple trial and (lots of) error.

This means that I empathise with the contestants on The Great British Bake Off (for those of you who haven't seen the show, it's a baking competition that sees baking experts Paul Hollywood and Mary Berry set tasks for enthusiastic baking amateurs such as me). I particularly empathised with the celebrities who took part in last week's Sports Relief Bake Off. I was once like them, an absolute novice who knew little or nothing about baking - except that I liked eating the end result!


I do think I've improved since then and one of last week's challenges presented me with the perfect chance to see how I measured up. The second programme saw each of the four contestants fail quite spectacularly in their attempts to make
Mary Berry's banana and chocolate chip loaf cake

Despite their dismal efforts, I didn't think it looked too difficult. I also thought it sounded delicious. So, I decided to try it for myself.

Here's my result:


A simply scrumptious cake that is perfect for weekend baking - moist as a result of the mashed banana and with the ideal amount of chocolate, enough to give you your chocolate hit without being too decadent for a January afternoon. 

And - I don't know what went wrong with those bakers on the Bake Off - it couldn't be easier to make.

I made double the amount in Mary's recipe as my loaf tin is twice as large as the one she uses. This meant that I had to adjust the cooking time but it also meant that I had enough cake to last two people (and several visitors) for the entire weekend - which is surely what a weekend cake is supposed to do.


Ingredients:

2 ripe bananas (peeled weight 200g/8oz)
2 tablespoons milk
100g/4oz soft butter
150g/6oz plain flour
150g/6oz caster sugar 
1 teaspoon bicarbonate of soda
1 teaspoon baking powder
2 eggs
100g dark chocolate chips (I bought a bar of chocolate and cut it into chunks)

To decorate:

40g dark chocolate chips

1 loaf tin measuring 28.5cm by 13cm by 6cm.

  • Preheat the oven to 160C/325F/Gas 3.
  • Grease and line your loaf tin with baking parchment.
  • Mash the peeled bananas with a fork and add to the milk, butter, flour, sugar, soda, baking powder and eggs.
  • Beat the ingredients with an electric hand-held whisk until they have combined and are smooth.
  • Stir in the chocolate chips and spoon the mixture into the loaf tin.
  • Bake for 50-60 minutes or until the cake is well risen, has begun to shrink away from the sides of the tin and has turned a golden-brown colour.
  • Set aside to cool for ten minutes then remove from the tin and leave to cool on a wire rack.
  • To decorate, melt the remaining chocolate in a heatproof bowl over a saucepan of simmering water.
  • Mary recommends spooning the chocolate into a piping  bag and piping zig-zags across the top of the loaf. This is a little too prim for my style so I decided to drizzle it haphazardly instead. 
  • Now, all you have to do is slice and serve.

This is a cake I would urge everyone to try. It's sweet but not too indulgent, making it perfect for a cold January afternoon. Go on. Have a slice!


I think Mary Berry would be proud of my cake. What do you reckon?

Monday, December 19, 2011

So, you don't like plum pudding? Never fear for Sharon is here...

There are only six days to Christmas and most of you will already be licking your lips at the thoughts of dinner. But what of those of you who don't find the prospect of a turkey dinner followed by plum pudding so appetising? What are you going to do?

This is where I come to the rescue. Because I am one of your tribe, particularly when it comes to the sweet treats of the festive season.

I don't like dried fruits. I find them overwhelmingly sweet and as a result, Christmas cake, plum pudding, mince pies and all sorts of other specialities of the Christmas season are off the menu for me (although I must admit I enjoyed these when I made them for my boyfriend last week).

Instead, I prefer my festive fancies to look more like this:


A layer of crunchy hazelnut meringue, a decadent chocolate cream and whipped cream offset by tart raspberries - could there be a better dessert?

This dessert is adapted from a recipe by Delia Smith. Here's what you need to do if, like me, you plan to treat yourself this Christmas.

Ingredients:
110g/4oz hazelnuts
225g/8oz golden caster sugar
4 large egg whites

140g/5oz dark chocolate, 70% cocoa solids
400ml double cream
160g/5 and a half oz raspberries (I use frozen raspberries at this time of year)

One baking tray measuring 10x14 inches (or 25.5 x 35cm), lined with baking parchment

  • Preheat the oven to 190 C/375 F/gas mark 5.
  • Toast the hazelnuts on a baking sheet at the top of the oven for 6 minutes. You want them to look like this:
  • Cool and grind in a food processor until finely chopped. Be careful not to overprocess or they will turn oily. What you want is something that looks like this:
  • Whisk the egg whites in a clean, grease-free bowl until they form soft peaks
  • Whisk in the caster sugar a little at a time.
  • Fold in the ground hazelnuts using a metal spoon.
  • Spread the mixture evenly in the prepared tin.
  • Bake in the centre of the oven for 20 minutes.
  • Cool and then turn out on to a piece of parchment paper that is slightly larger than the roulade and gently ease away the lining.
  • Melt the chocolate in a heat-proof bowl over simmering water, making sure the bowl doesn't touch the water. Remove from the heat and allow to cool.
  • Whip the cream and divide it between two bowls.
  • Reserve four tablespoons of chocolate for decoration and add the rest to one bowl of whipped cream. Spread it over the meringue to within half an inch or one centimetre of the edge.
  • Spread the whipped cream over the chocolate layer:
  • Then stud with the raspberries, like so:
  • You now have two options. If you're confident of your roulade-rolling skills, you can roll this into a swiss roll shape. You do this by placing the meringue so that its long side faces you. You then use the paper to assist you in rolling the meringue to form a long log shape.
  • You're not supposed to worry about the meringue cracking as it's all supposed to be part of the charm. But my meringue always seems to crack a little too much. So, I usually just skip the rolling part and simply drizzle this flat (but no less delicious) confection with my remaining melted chocolate.
(My latest - not so successful - attempt at rolling a roulade)
  • If you're braver and more skilled than me and succeed in rolling your roulade properly, all you need to do is make sure the seam is at the base of the roulade and drizzle it with chocolate. Then, stand back and marvel at the beauty of what you've created.
With this as your dessert, you're guaranteed a very Merry Christmas. 

    Monday, April 11, 2011

    Chocolate: who could live without it?

    My boyfriend is an addict. An addict who has to eat a bar of chocolate every day after his lunch.
    This sometimes makes me cross and I have been known to nag him about it. There have even been occasions when, in an attempt to shut me up, he has tried to cut back on his chocolate intake.
    However, no matter how much I nag, he eventually relapses and reverts to his life-long habit of eating a chocolate bar a day.

    The man is the very definition of a chocoholic.

    One day, probably after I'd nagged him beyond endurance, he approached a friend of ours who is a trained hypnotherapist.
    "I'd like to be hypnotised," he said. "Do you think you could do it for me?"
    "Sure," said Julie, the hypnotherapist. "What do you want to be hypnotised for?"
    "I want to give up chocolate," said my boyfriend, full of resolve as he faced a future without chocolate.
    "Oh no, I couldn't do that," said Julie. "Life without chocolate is no life at all."

    Chastened by her words, my boyfriend reconsidered his decision and as a result, he remains addicted to chocolate to this day.

    This chocolate tart - taken from the wonderful Ladurée cookbook- is for him, to make up for my incessant and ultimately futile nagging.


    Don't be put off by the long list of ingredients or what looks like a complicated method in this recipe. The time involved in making this tart mostly consists of waiting for the pastry to rest and cook. The steps are actually quite simple and the end result is more than worth the effort.

    Step 1: Make the pastry
    Ingredients:
    200g flour
    120g unsalted butter softened and cubed, plus extra for greasing the tin
    75g icing sugar
    25g ground almonds
    12g best quality unsweetened cocoa
    1 pinch of salt
    1 egg


  • Weigh your ingredients.

  • Sift the flour into a bowl and add the cubes of butter, icing sugar, ground almonds, cocoa and salt.

  • Rub the mixture together using the tips of your fingers until you have the consistency of breadcrumbs.

  • Mix in an egg and once the dough has come together and resembles pastry, shape it into a ball, cover it in clingfilm and put it into the fridge for an hour.

  • (If you've got a free-standing mixer such as a Kenwood or a KitchenAid, let it complete the above steps for you.)

  • Once the hour is up, unwrap your pastry and roll it to fit a 24cm tart tin.

  • (Here's a tip for rolling pastry: place your pastry on a sheet of clingfilm and place another sheet on top. This will allow you to roll your pastry without having to worry about it sticking to your work surface or to your rolling pin.)

  • Butter and flour your tart tin and then press in the pastry.

  • Allow it to rest for another hour in the fridge.

    Step 2: Start making the chocolate meringue layer 30 mins before the pastry needs to go in the oven.
    Ingredients:
    45g good quality chocolate (I used chocolate with a 70% cocoa content)
    3 eggs
    65g caster sugar


  • Preheat the oven to 170 degrees Celsius

  • Line a baking tray with grease-proof paper.

  • Trace a circle with a 22cm diameter onto the paper (if you're using a slightly bigger or smaller tin than the 24cm one recommended, make your circle 2cm smaller than the tin you're using.)

  • Melt the chocolate in a bowl over a saucepan of simmering water.

  • Separate the eggs.

  • Beat the yolks with 35g of the caster sugar until they have a the consistency of mayonnaise.


  • In another bowl, beat the egg whites until they form soft peaks then add the sugar and continue beating until they are quite stiff.

  • Pour 1/4 of the egg white mixture into the egg yolks and then mix in the melted chocolate.

  • Pour in the rest of the egg whites and fold them in carefully.

  • Pour the mixture into a piping bag and starting in the middle of the circle you have drawn on the grease-proof paper, pipe a circle onto the tray.

  • Cook in the oven for 15 minutes.

  • Allow to cool.

    Step 3: Cook the pastry

  • Prick holes in the pastry with a fork and line it with some parchment and baking beans (or whatever you use to weigh down pastry).

  • Cook at 170 degrees Celsius for 25 mins.

  • Allow to cool.

    Step 4: Make the ganache
    Ingredients:
    300g good quality chocolate (for this I used a mixture of 200g of 70% cocoa and 100g of 40%)
    300g double cream
    100g of softened unsalted butter, cubed


  • Cut the chocolate into small chunks and place in a bowl.

  • Bring the cream to the boil.

  • Pour half of the boiling cream over the chocolate and whisk the mixture together.

  • Pour in the other half and whisk again.

  • Add the cubes of butter, little by little and fold them into until the ingredients have melted together and the mixture is smooth and shiny.

    Step 5: Assemble the tart

  • Pour a thin layer (2-3 ml deep) of ganache over the pastry.


  • Place the chocolate meringue layer over that.

  • Pour the rest of the ganache on top.

  • Leave to rest for 30mins at room temperature.

  • Decorate with shavings of chocolate.


    What you will now have is a chocolate tart that defies belief.
    The pastry is crisp, chocolatey and sweet.
    The dense and smooth richness of the ganache is broken by the crunch of the meringue layer.
    I can't imagine a more perfect mouthful.

    I hope it makes up for my nagging...
  • Thursday, March 3, 2011

    Sharon has a case of spring fever: bring on the chocolate!


    Spring seems to have arrived in West Kerry. And isn't it pretty?

    It's very welcome too. The brighter mornings mean that I'm not (quite) as reluctant to get out of bed when the alarm rings. The longer evenings mean that my dog now gets a walk when I've finished work for the day - something that makes him ridiculously happy.

    And much more unexpectedly, the hint of green growth in the air and the (admittedly slight) upturn in temperatures have made me miss my stall at Dingle's Farmers' Market.

    At the end of October last year, I was glad to pack my stall away. I was exhausted and needed a rest from the back-breaking work of baking. But months have now gone by and I'm itching to return to the kitchen. I miss the chatter of the customers and the banter of the other stallholders. It's time for Little Miss Cupcake to return.

    Thus inspired, I decided yesterday was a day for experimenting with new products for my stall. This was the end result:


    Mini chocolate and raspberry tarts (taken from the Avoca Café Cookbook) and little chocolate and raspberry pots (made with leftover chocolate mixture)

    Here's how I made them:
    Shortcrust pastry:
    225g/8oz plain flour
    150g/5oz butter, diced
    25g caster sugar
    1 egg yolk

    Chocolate filling:
    190g/7 and a half oz raspberries
    350ml/12 fl oz double cream
    15g/half an ounce caster sugar
    250g/9oz dark chocolate, grated
    1 tablespoon rum (optional)
    Raspberries to decorate


  • Sift the flour into a bowl and rub in the butter until the mixture resembles fine breadcrumbs. (If you're lucky enough to have a mixer or a food processor, this can do the hard work for you.)

  • Stir in the caster sugar and then mix in the egg yolk. By this stage, your pastry should hold together but if it's still crumbly and dry, you can add some cold water if necessary.

  • Wrap the pastry in clingfilm and leave it to rest in the fridge for 30 mins.

  • Roll it out on a lightly floured surface and use it to line eight mini tartlet tins (mine were 9cm in diameter).

  • Cover the pastry with greaseproof paper and fill with baking beans. (If you have ceramic ones, use those but any dried beans will do. Their function is to prevent the pastry from rising.)

  • Bake in an oven which has been preheated to 180 degrees C/350 degrees F/gas mark 4 for 15 mins.

  • Remove the beans and greaseproof paper and return the pastry cases to the oven for another 5 mins until very lightly coloured.

  • Leave to cool


  • When the pastry has cooled, line the base of each tart with raspberries.

  • Put the cream and sugar in a pan and bring to the boil, then remove from the heat and stir in the chocolate until it melts.

  • Add the rum, if using.

  • Leave to cool a little then pour the mixture over the raspberries.

  • Leave to set in the fridge for a minimum of one hour.

  • Decorate with more raspberries and serve.

    I had some chocolate mixture left over and decided to use it to make chocolate pots. I put some raspberries in little espresso cups and then covered them with chocolate, placed them in the fridge to set and put a pert little raspberry on top.

    My verdict? These tarts and pots would appeal to customers with sophisticated tastes; those who like their chocolate strong and bitter and their desserts tangy and tart. I can think of several who will love them but I know lots have a sweeter tooth. I'll have to come up with a variation that will appeal to them too. I'm thinking chocolate honeycomb tarts and pots. Watch this space!
  • Tuesday, February 8, 2011

    Memories are made of... chocolate


    I made an exciting discovery this weekend. A really exciting discovery.

    Finding myself at a loss for something to do on Sunday afternoon, I decided to try to organise a recipe folder I've been keeping for years. You know the kind: one that's crammed full of recipes torn from magazines and newspapers as well as things you've scribbled from friends and websites.

    Hours were to pass as I ooh-ed and aah-ed over recipes I'd long since forgotten. Vodka and lime jellies, my friend's mum's banana bread and then...

    Then, I found THIS:

    A recipe that I thought I'd lost years ago.
    A recipe whose loss I've lamented all those years.
    A - no, THE - recipe for chocolate torte.

    This was the torte I'd drooled over for the entire summer of 1999 when I worked as a waitress in a restaurant in Dingle. The torte I'd steal slivers from when nobody was looking. The torte I finally convinced the chef to reveal the recipe for.

    I was to make this torte over and over again until I lost the recipe, eventually forgot about it and started to make other chocolate creations in its place.

    The elation at finding this recipe was immediately followed by doubt. Would this torte be as good as I remembered? We all know that memories are fickle and can play cruel tricks on us. More importantly (and likely), the 19-year-old me probably wasn't as demanding in her tastes as the 33-year-old me is.

    There was only one thing for it. I'd have to try it and see.

    So, I went to the shops yesterday in search of liquid glucose (a gloopy sweetener that I've only ever used in this particular torte and which used to only be available from chemists but is now to be found in most big supermarkets) and this morning, I put the torte to the test.

    Here's the recipe:
    225g digestive biscuits
    60g unsalted butter
    1 pint/475ml double cream
    1 lb/450g chocolate (I used one with 70% cocoa solids)
    1 tbsp glucose syrup (I know the recipe above specifies 2 but 1 seemed more than enough. Chefs don't always know everything, you know!)
    5tbsp Baileys (you can add slightly more or less depending on your taste)


  • To make the biscuit base, melt the butter and crush the biscuits.


  • You can do this by blitzing them in the food processor or, if you don't have a food processor, you can crush them in a pestle and mortar or with a rolling pin.


  • Line the base of a tart or springform tin that is 25cm in diameter with the crushed biscuits and bake in a 180 degree (356F or gas mark 4) oven for 8 mins. Set aside to cool.


  • Break the chocolate into chunks and melt. I do this in the microwave (for 30 seconds at a time) or you can also do it by placing the chocolate in a bowl over a saucepan of simmering water (making sure the bowl isn't touching the water).


  • When melted, stir in the liquid glucose and the Baileys. The liquid glucose will completely transform the texture of the chocolate, making it much thicker and more set.


  • Lightly whip the cream and then add it to the chocolate, whisking until you get a texture like this:


  • Spoon this on to your biscuit layer. Smooth the surface. Place in the fridge to chill and spend the next hour or so twiddling your thumbs as you wonder just how delicious it's going to taste (you may decide to skip that last step but I certainly didn't!)


  • When you take it out of the fridge, go around the inside of the tin with a knife and ease the torte out of the tin. I used a knife I had warmed in a cup of boiling water to make this easier.


  • Then, I sat down, poured myself a cup of Lapsang Souchong tea (my tea of choice to go with cake) and, full of trepidation, took my first bite...

    Did it live up to my expectations? Excuse me while I resort to text speak here but: OMG, it did. Rich, unctuous, melt in the mouth, chocolately goodness with a undertone of Baileys. It brought me right back to my waitressing, chocolate torte-scoffing days.
    You must all make this torte. It's so simple and you can ring the changes by adding chopped hazelnuts to the base or alternating the Baileys with Cointreau and highlighting the citrus notes by mixing some orange zest into the crushed biscuits. That's what I'm planning to do next time.
    But for now, I still have this torte to savour. It's what memories are made of.

      Saturday, January 29, 2011

      A birthday girl needs cake

      Today is a friend's birthday. This is good news for her but it's also good news for me. I now have an excuse to try my first recipe from 'Bake & Decorate' by Fiona Cairns. I've had this cookbook for a few weeks but in an attempt to be virtuous for the month of January, I've been studiously avoiding the temptation of the recipes contained inside.

      This is coming to an end right now because I'm going to bake this cake, a flourless chocolate hazelnut cake:

      This cake ticks all of my boxes.
      Chocolate?
      Yes.
      Gooey, moist chocolate?
      Yes, yes, yes.
      Gooey, moist chocolate with chocolate ganache and raspberries?
      Yes, yes, yes, yes, YES...!

      Here's the recipe:
      Ingredients for the cake:
      90g unsalted butter, cubed
      60g blanched hazelnuts
      150g chocolate, 70% cocoa solids, broken into pieces
      90g golden caster sugar
      3 eggs, separated

      Ingredients for the ganache:
      100g chocolate, 70% solids, broken into pieces
      50ml double cream
      25g unsalted butter
      400g raspberries
      • Preheat the oven to 180 degrees.
      • Butter a 20cm round cake tin and line the base with baking parchment.
      • Roast the hazelnuts in the oven for 5 mins or so. (Watch carefully to make sure they don't burn.)
      • Cool the hazelnuts and grind finely in a food processor.
      • Place the chocolate, 70g of the sugar and the butter in a bowl over gently simmering water (make sure the bowl is not touching the water) and melt together very gently.

      • Remove from the heat and stir in the hazelnuts.
      • Beat the egg yolks together until they change to a paler colour, something like this:
      • Then add them to the cooled chocolate mixture.
      • In another (very clean) bowel, whisk the egg whites and then slowly add the remaining caster sugar until the mixture forms soft peaks.
      • Take a large spoonful and fold it into the chocolate mixture to lighten it a little.
      • Then fold in all of the remaining egg whites as gently and as lightly as you can, using either a large metal spoon or a spatula.
      • Pour into the tin and bake for 20 mins.
      • Leave to cool for 15 mins then run a knife around the edges to loosen it from the tin.
      • When the cake is cool, turn it very carefully out onto a serving plate, using the base as the top.
      • To make the ganache, melt the chocolate, cream and butter in a bowl over very gently simmering water (again making sure it doesn't touch the water). Stir together and then cool a little until it thickens.
      • Pour over the cake and spread with a palette knife.
      • Stud the surface with raspberries and you should have something that looks like this:
      Yum! Now to deliver it to the birthday girl...

      (This cake is very easy to make. It's ready in next to no time. The fact that it's flourless means that it's suitable for people on gluten-free diets. I'll definitely be making more from this cookbook.)

      Addendum: In fact, I liked this cake so much that I made it for my boyfriend within 24 hours of delivering it to the birthday girl. This time, I omitted the butter from the ganache and I thought it worked better. I don't know if anyone else finds this but every time I make ganache with butter in it, the butter separates and forms a not-very-attractive film on top. Anyone got any ideas why this might be?

      Monday, September 13, 2010

      Sharon is exceptional.

      I don't mean to boast but I finally have categorical proof of just how exceptional I am. Unfortunately, I am loathe to admit that I am exceptional in an undesirable way. I appear to be exceptionally sensitive to pain, especially to the sharp jab of pain caused by the prick of a needle.
      I've always hated needles - and by extension doctors, dentists and even sewing - but it was only when I tried acupuncture for the first time last week that I realised my aversion to them was based on something real.

      "This won't hurt at all," promised the acupuncturist as he inserted a needle into the top of my head last Friday. "Very few people have many nerve endings here."
      "Ouch", said Sharon, wincing.
      "Oh," said the acupuncturist. "You are exceptional."

      There we have it. Proof positive of just how extraordinary I am.

      After two acupuncture sessions (which left me with actual bruises but also resulted in my arm ,which has been experiencing unexplained muscle spasms for the past six weeks, feeling dramatically better), I felt as though I needed some consolation, as well as a celebration.
      So, I baked this:

      This was one of those rich and aromatic flourless types of chocolate cakes that you can almost hear melting in your mouth. (I found it in Nigella Lawson's Nigella Bites cookbook.)

      Ingredients:

      250g dark chocolate (minimum 70% cocoa solids) 125g unsalted butter (softened)
      6 eggs (2 whole, 4 separated)
      175g caster sugar
      2 tbsp Cointreau (optional but how could you resist?)
      Grated zest of 1 orange (optional and ditto)

      Cream topping:
      250ml double cream (Nigella recommends 500ml but this is too much for me)
      1 tsp vanilla extract
      1 tbsp Cointreau (optional)
      1/2 tbsp cocoa powder for dusting

      Prep:
      • Preheat the oven to 180 degrees/gas mark 4.
      • Line the bottom of a 23cm springform baking tin with baking parchment.
      • Melt the chocolate (I usually do this in the microwave or you can use a double boiler*).
      • Add the butter and let it melt in the warm chocolate.
      • Beat the two whole eggs and four egg yolks with 75g of the caster sugar.
      • Add the chocolate mixture, Cointreau and orange zest.

      • In another bowl, whisk the four egg whites until foamy, then gradually add the remaining 100g of caster sugar and whisk until the whites are holding their shape but are not too stiff.
      • Lighten the chocolate mixture with a dollop of the whites and then fold in the rest.
      • Pour into the tin and bake for 35 to 40 minutes or until the cake is risen and cracked and its centre is no longer wobbly.
      • Cool the cake in its tin on a wire rack. And don't panic when the middle begins to sink. This is supposed to happen!
      • When the cake has cooled, place the tin on a plate or cake stand and carefully remove it. Don't worry about cracks or rough edges. If anything, they will convince sceptics you've made the cake yourself!
      • Whip the cream until it is soft and add the vanilla and Cointreau (if using).
      • Fill the crater of the cake with the cream and dust the top with cocoa powder.
      • Dig in.
      * Be careful when microwaving chocolate. I usually microwave it for 1 minute and for 10 second intervals after that. It's easy to burn it and it's tragic to waste chocolate.