Showing posts with label cake. Show all posts

Friday, February 6, 2015

A good movie, a bad memory and a great cake

I went to the cinema to see The Theory of Everything last weekend. It’s the story of a young woman who falls in love with a young Stephen Hawking and the struggles she faces as they build a relationship, a family and a life together as his body deteriorates and eventually gives way to severe disability.

The two central performances are wonderful and this film is enormously affecting on a personal level. So, I’d recommend that you see it. But I’m not really here to give a film review. I’m here to write about a scene in the film that brought back memories of one of the worst times in my life with MS.

Most of you will know that Stephen Hawking has motor neuron disease, a disease of the central nervous system that leads to progressive disability and ultimately to death. Early in the movie, when he is being tested prior to his diagnosis, he is asked to do a simple task – to touch the thumb of his right hand to each of the fingers on that same hand.

Eddie Redmayne (who plays Hawking) is so convincing at portraying the confusion he feels when he realises he can’t do this.  Later, there’s a look of sheer anguish on his face as he tries to do it again at home. He suddenly understands he can no longer bid his body to do as he wishes. He’s losing control of his physical self.

My stomach churned as I watched this scene and I can feel it churning still. It could have been a scene from my life because my neurologist asked me to complete that same task before I was diagnosed with MS (I suppose it’s a standard diagnostic tool) and I remember the sense of shock I felt when I wasn’t able to do it. Although my brain was thinking the thoughts that had always previously resulted in moving my fingers, I couldn’t make them meet my thumb. My disbelieving eyes saw them miss every time. Despite trying over and over and over again, I couldn’t get them to do what I wanted.

This persisted for the six weeks that the attack lasted. At random moments of every day, I would try to complete the task again only to have my heart sink when I saw that I still wasn’t able to do it.

However, I did eventually recover and was once again able to make my fingers and thumbs do exactly what I asked of them. But I have never forgotten how frightened I felt when I lost control of my body. Sometimes, when I’m sitting at the dinner table or watching TV or being driven in a car, I absentmindedly find myself touching my fingers to my thumb, as if subconsciously reassuring myself that all is still well – that I am still well.

And so far, I have been.

I attribute my continued good health to my diet. And whenever I feel tempted to eat butter, cream and chocolate, I remind myself what it felt like not to be able to use my right hand properly.
I used to have to remind myself of this quite often, especially when I would think of Mary Berry's banana bread - which was once my go-to banana bread in the café and at home. 
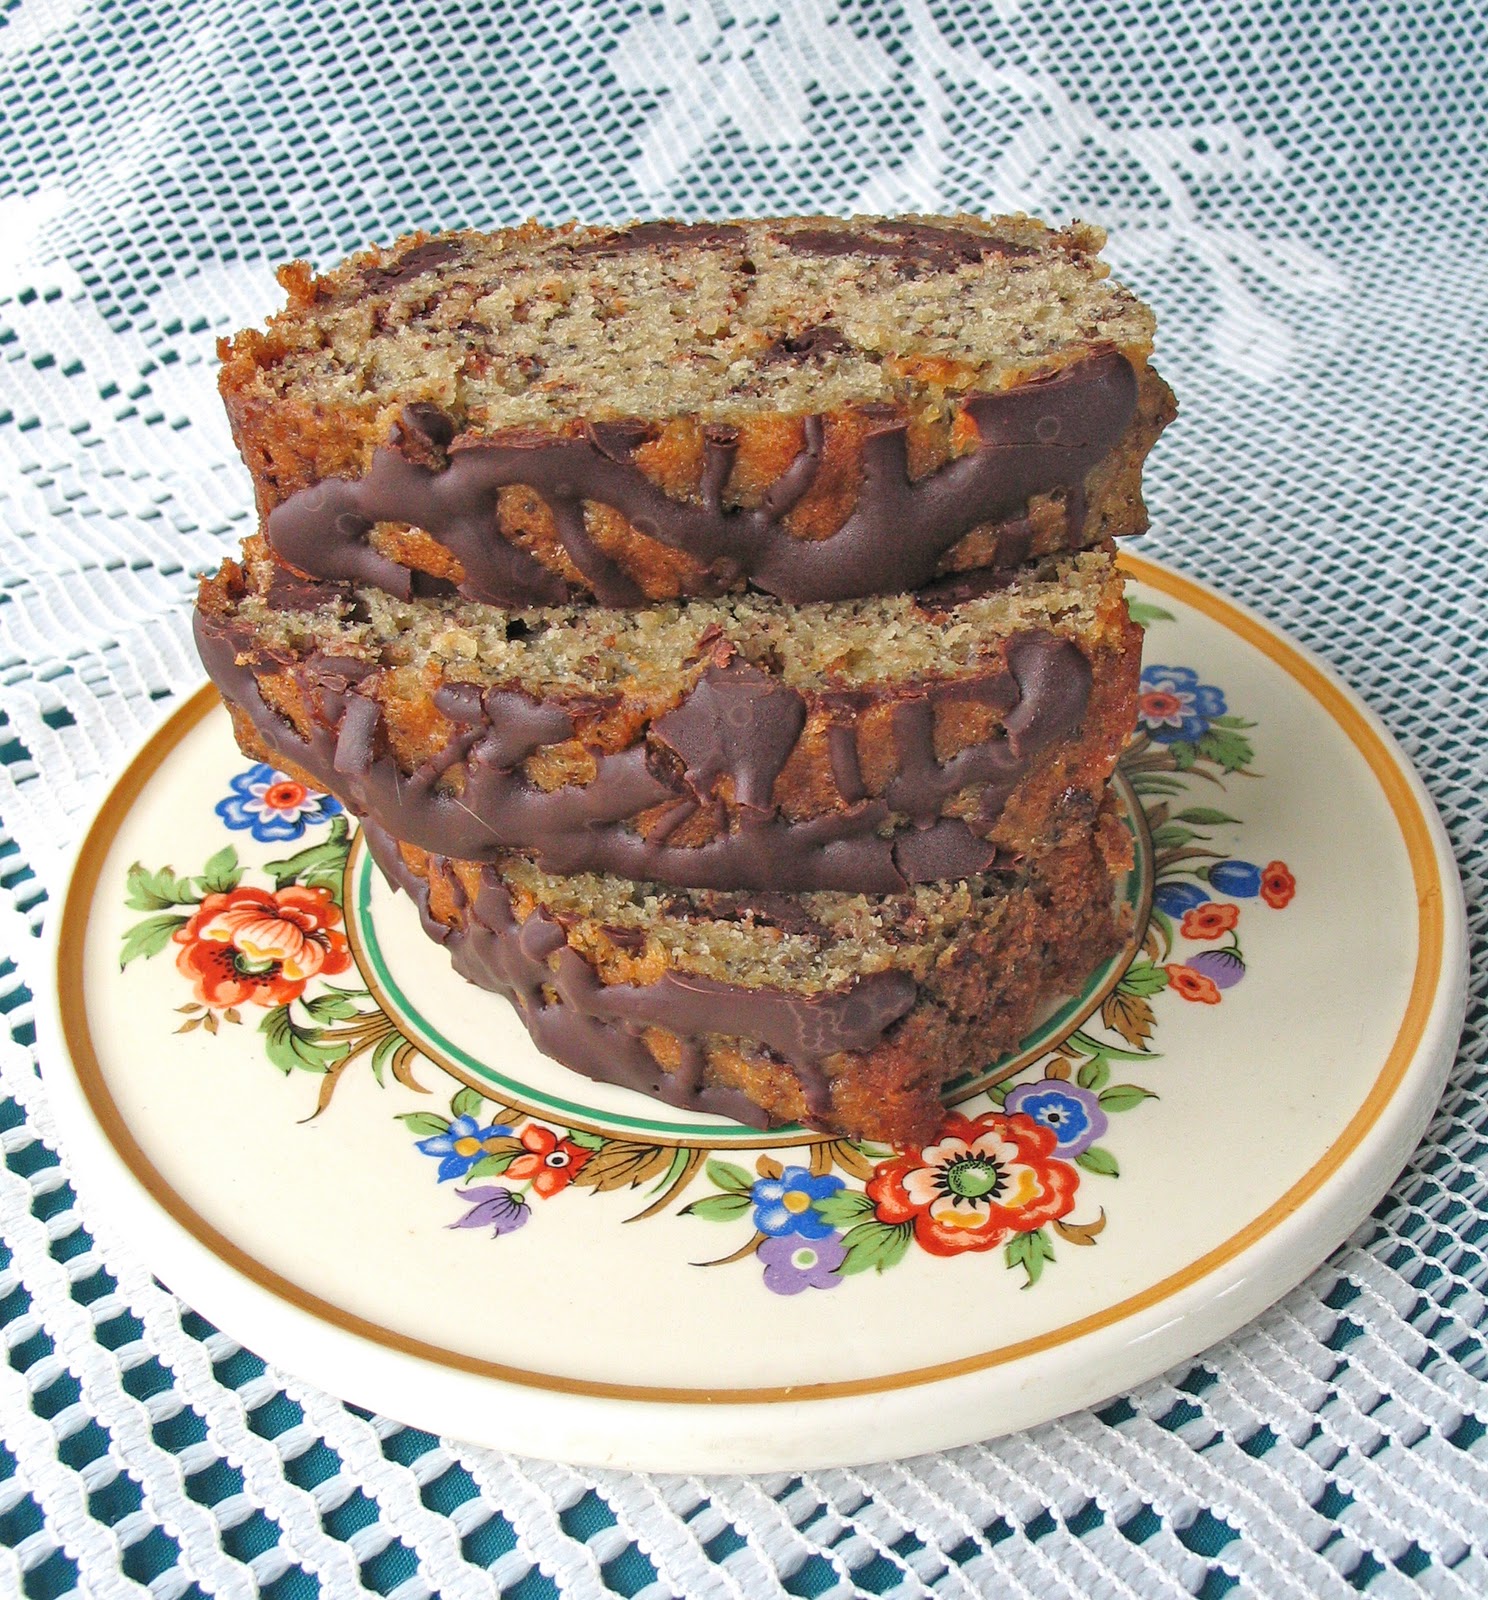
But I don't have to control myself with such mind games anymore - at least not when it comes to banana bread. I've come up with a recipe that is not the same as Mary Berry's but it's just as delicious and it packs a much bigger nutritional punch.


I thought I'd share it with you today.
200g mashed ripe bananas* (this will require two to three bananas, depending on their size)
1 tablespoon almond milk
50g olive oil (choose one with a mild flavour)
25g cocoa powder
50g plain flour
1/2 teaspoon baking powder
1/2 teaspoon baking soda
75g sugar
60g walnuts, chopped 
20g banana chips, chopped (optional)
3 tablespoons cocoa nibs (optional - especially if you are strict about OMS)
1 egg

  • Preheat your oven to 170 C/340 F.
  • Line a small loaf tin with some baking parchment. I find that the easiest way of doing this is rubbing a left-over butter wrapper over the inside of the tin, scrunching the parchment into a ball with my hands and then using my fingers to shape the parchment to the bottom and sides of the tin. The scrunched-up nature of the paper makes it much more pliable.
  • Combine all of your ingredients in a bowl and mix thoroughly.
  • Pour into the lined tin and place in the centre of your oven.
  • Cook for 30 to 35 minutes or until a skewer comes out clean.
Enjoy the cake with a cup of tea (and if you can, go to see the movie!)

* There's no such thing as over-ripe bananas. The blacker they are, the better they will be for baking, producing super-moist cakes.



Tuesday, October 21, 2014

An immodestly good cake

I was always good at school and did well in exams. Growing up in the 1980s, the Dingle Peninsula was a much more tightly-knit place than it is today. So tightly-knit that a lot of people were curious as to how well I would do in my Leaving Certificate (the final exam we sit at secondary school and the one that determines our place at university here in Ireland).

I was delighted with my results when I received them. Years of hard work and study had paid off. Yet I was a little confused when various neighbours commiserated with me in the following days.

Where were the congratulations? Why did they think I needed consoling?

My mother was getting the same reaction and was confused too. However, she eventually figured out that it was all my father's fault...

My father is the most modest man I have ever met. Nothing in his being will ever allow him to boast about anything. When people asked him about my exam results, his response was to say that I had done 'alright'. Understandably, they interpreted this to mean that he (and therefore I) was disappointed. After all, proud parents shout about their children's achievements from all available rooftops, don't they? 
That's definitely not the case with my almost-pathologically modest father...

You're probably wondering what this has to do with cake. Well, I'm about to commit a cardinal sin in my dad's book by saying that this is one of the best cakes you'll ever make.

It's inspired by a trip I took to Brother Hubbard Café on Capel Street in Dublin at some stage last year (a café that is well worth checking out if you want lunch or a snack made from quality, Irish and seasonal ingredients the next time you're in town).
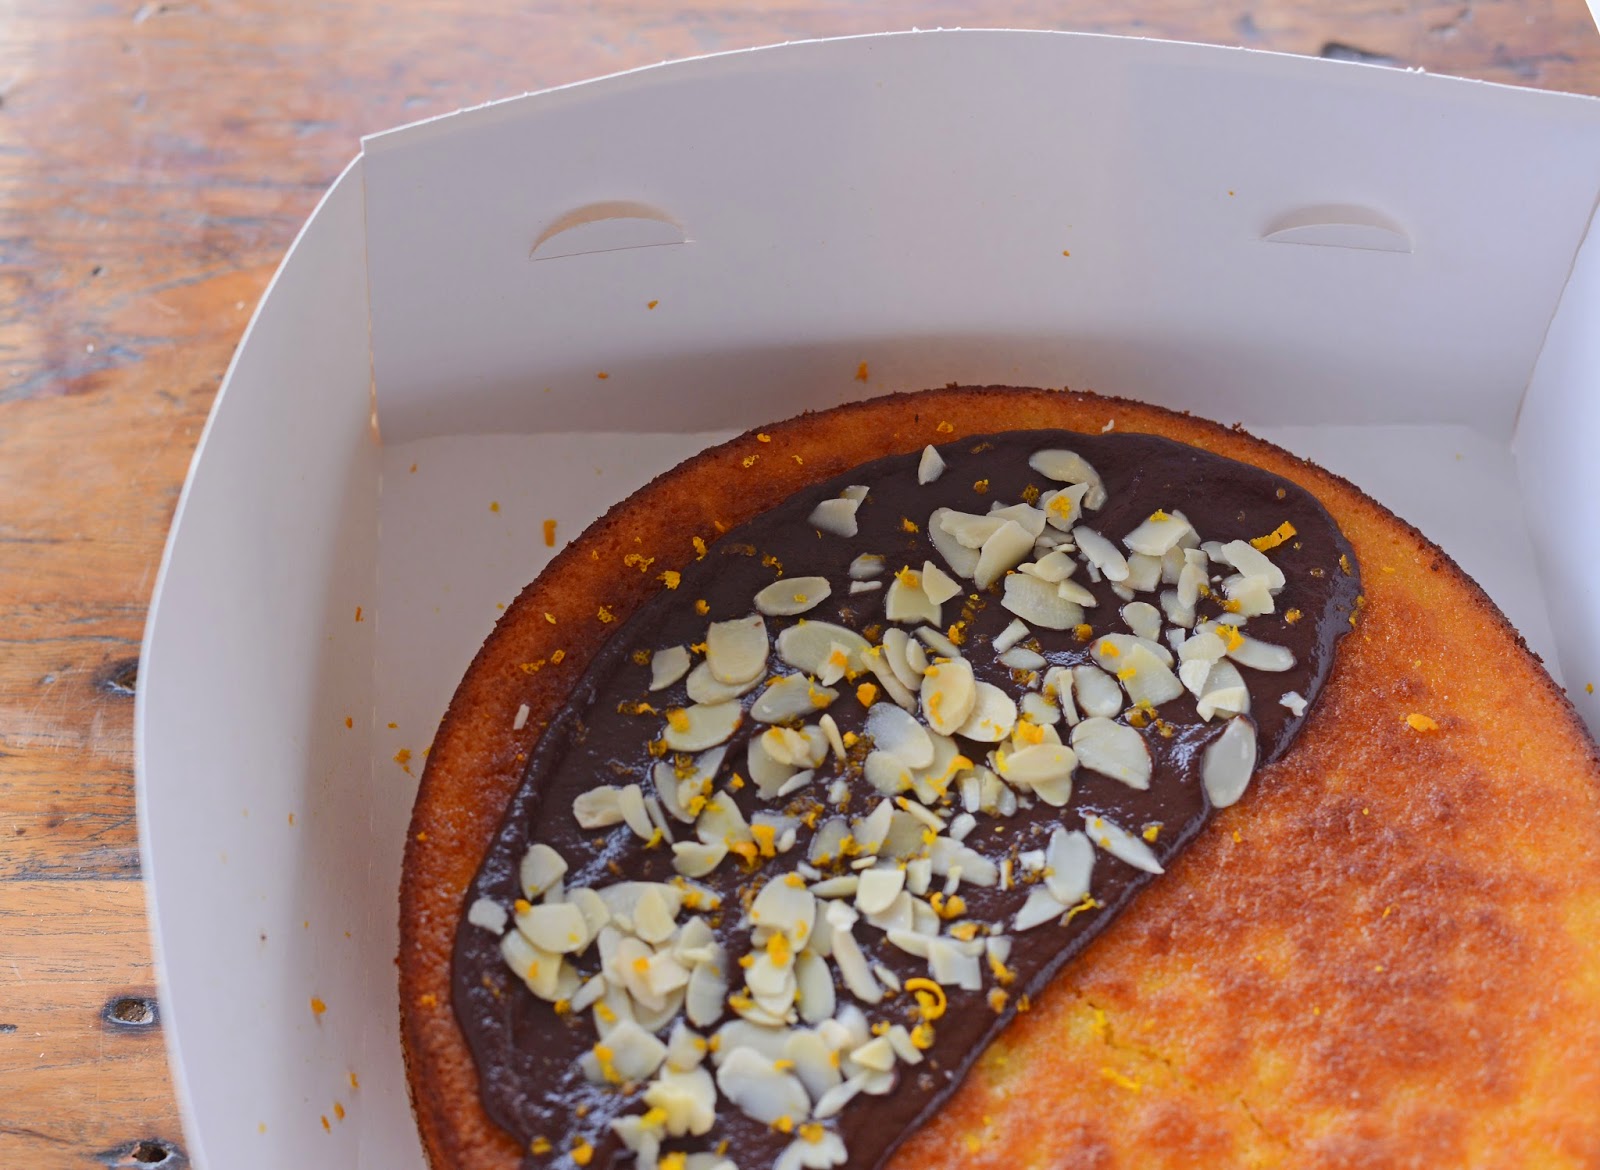
When I visited, I tried their almond and orange buns topped with dark chocolate. These burst with citrus flavour and the chocolate added a touch of luxury. They were moist and gluten free and I immediately set about making my own version as soon as I got home.

After some experimentation, I came up with a cake instead of buns and put it on the menu in my café. It was a hit with customers and (whisper it) I think it's just as good as the buns in Brother Hubbard's. (Sorry for the immodesty, Dad!)
Don't worry: there's a reason why it's only decorated on one side!
Here's what you need to make it:
2 oranges,
5 eggs,
300 grams caster sugar 
250 grams ground almonds 
1 teaspoon baking powder
  • Place the two oranges in a saucepan. Cover with cold water. Bring to the boil and simmer for one hour.
  • Pre-heat the oven to 180 degrees Celsius/350F/Gas mark 4.
  • Butter the base of a 26-cm round tin and line with parchment paper.
  • Chop your cooked oranges. I prefer to do this in the food processor but if you'd like chunkier pieces of orange in your cake, it's best to use a knife. Just be careful you don't lose too much of that precious juice!
  • Beat the eggs and the sugar for approximately two minutes, until well combined and frothy.
  • Add the chopped oranges and beat again.
  • Then add the ground almonds and baking powder and combine thoroughly.
  • Pour your mixture into your prepared tin and cook for 30 to 40 minutes. Check after 30 minutes as some ovens will bake this cake more quickly than others. The cake should be golden brown in colour and set in the middle. An inserted skewer should come out damp, not sticky.
  • Allow the cake to cool in its tin while you prepare the topping.
To decorate:
100 grams chocolate (I find 50 to 60% cocoa best )
60ml cream
Zest of half an orange
Flaked almonds
  • Break the chocolate into a heavy-bottomed saucepan and add the cream.
  • Place over a low heat and stir with a spatula. Don't be tempted to leave the stove while this is cooking. It could burn before you know it.
  • Once the chocolate has melted and combined with the cream into a glossy ganache, remove the cake from its tin and take off the parchment paper. Place on a cake plate and spread the ganache over the top. 
  • Sprinkle the flaked almonds and the orange zest over the ganache and leave to set before digging in.
Some people prefer this cake without any icing at all. They do so for several reasons. The absence of chocolate and cream makes it dairy free. And those who like pure clean flavours enjoy the strong orange taste without the distraction of chocolate.

Because I don't eat dairy and because I was bringing this cake to my sister's house where her daughter also avoids dairy, I only decorated one half of it.

A cake to suit all tastes
However, when we got there, my niece was much more interested in playing with our dog Jimmy than she was in eating cake.


Jimmy and Hannah: besties - at least some of the time!
Meanwhile, the adults got momentarily sidetracked by the prospect of meeting the newest addition to the family, my one-week-old nephew Conor.


Can you believe anyone's hand could be so small?
The lure of the cake did eventually drag us back though. It's that good! 
(Sorry, Dad!)


Sunday, March 3, 2013

Comfort eating on a Sunday afternoon: chocolate, cheesecake and raspberry brownies

I'm finding it hard to stay positive these days. Everywhere I look and listen, it seems as though the cost of living is creeping ever higher while people are struggling to make do with falling incomes. It worries me that I'm about to open the café for a second season at a time when people's discretionary spending has never been so limited.

When I feel anxious or pessimistic, I often turn to food for comfort. Food is great like that, isn't it?  Sometimes, all you need when you're feeling under the weather is a bowl of broth that is brimful of vegetables while (on the - ahem! - completely other end of the healthy spectrum) a serving of this decadent treat can make you believe that all is indeed well with the world.

Chocolate, cheesecake and raspberry brownies - an edible way of putting the world to rights!
At first glance, this recipe may scare you. I'll admit that there's a lot of sugar in it but this brownie is so rich that you'll only eat a little of it at any one time so you needn't feel too guilty (and I needn't worry about giving you all diabetes!)

Brownie recipe:
225g unsalted butter
100g chocolate (I use 75g of 70% chocolate and 25g good milk chocolate)
75g cocoa powder
450g caster sugar
4 eggs
A pinch of salt
100g self raising flour

Cheesecake recipe:
225g cream cheese
100g caster sugar
1 egg
3 tablespoons of flour

100g raspberries
  • Line a brownie tin with parchment paper and set the oven to 180 C/350F.
  • Melt the butter, chocolate and cocoa powder in a pan over a medium heat, stirring well to combine.
  • Beat the sugar and the eggs along with a pinch of salt until light and airy.
  • Add the chocolate mixture and beat to combine.
  • Fold in the flour.
  • Make the cheesecake by mixing all of the ingredients together until well combined.
  • Pour 3/4 of the brownie mixture into your brownie tin. 
  • Pour the cheesecake mixture over that.
  • Add the remaining brownie mixture.
  • Using a skewer, swirl both mixtures together to create a pretty marbled effect.
  • Scatter the raspberries on top, pressing them down into the mixture a little so that they don't dry out too much or burn while cooking.
  • Bake in the oven for 40 to 45 minutes.  The mixture should look something like this and an inserted skewer should come out wet but not sticky.
  • Allow to cool and cut into small slices. I cut mine into 24 slices. 
Make yourself a cup of tea and give yourself time to savour this special treat. Chocolate, cheesecake and raspberries; there could surely be no better comfort in these financially tough times.

Monday, January 16, 2012

The Great British Bake Off: how does Sharon measure up?

Some of you will already know that I have a stall at Dingle Farmers' Market where I sell cupcakes and other baked sweet treats. You'll know that I bake regularly and enjoy it. However, I wouldn't go so far as to say that I'm a baker. I've never taken a single class in baking (apart from the classes in home economics we had at school, where I am embarrassed to say that I never showed much promise - sorry teach!). Everything I know about baking, I've learned from books and from simple trial and (lots of) error.

This means that I empathise with the contestants on The Great British Bake Off (for those of you who haven't seen the show, it's a baking competition that sees baking experts Paul Hollywood and Mary Berry set tasks for enthusiastic baking amateurs such as me). I particularly empathised with the celebrities who took part in last week's Sports Relief Bake Off. I was once like them, an absolute novice who knew little or nothing about baking - except that I liked eating the end result!


I do think I've improved since then and one of last week's challenges presented me with the perfect chance to see how I measured up. The second programme saw each of the four contestants fail quite spectacularly in their attempts to make
Mary Berry's banana and chocolate chip loaf cake

Despite their dismal efforts, I didn't think it looked too difficult. I also thought it sounded delicious. So, I decided to try it for myself.

Here's my result:


A simply scrumptious cake that is perfect for weekend baking - moist as a result of the mashed banana and with the ideal amount of chocolate, enough to give you your chocolate hit without being too decadent for a January afternoon. 

And - I don't know what went wrong with those bakers on the Bake Off - it couldn't be easier to make.

I made double the amount in Mary's recipe as my loaf tin is twice as large as the one she uses. This meant that I had to adjust the cooking time but it also meant that I had enough cake to last two people (and several visitors) for the entire weekend - which is surely what a weekend cake is supposed to do.


Ingredients:

2 ripe bananas (peeled weight 200g/8oz)
2 tablespoons milk
100g/4oz soft butter
150g/6oz plain flour
150g/6oz caster sugar 
1 teaspoon bicarbonate of soda
1 teaspoon baking powder
2 eggs
100g dark chocolate chips (I bought a bar of chocolate and cut it into chunks)

To decorate:

40g dark chocolate chips

1 loaf tin measuring 28.5cm by 13cm by 6cm.

  • Preheat the oven to 160C/325F/Gas 3.
  • Grease and line your loaf tin with baking parchment.
  • Mash the peeled bananas with a fork and add to the milk, butter, flour, sugar, soda, baking powder and eggs.
  • Beat the ingredients with an electric hand-held whisk until they have combined and are smooth.
  • Stir in the chocolate chips and spoon the mixture into the loaf tin.
  • Bake for 50-60 minutes or until the cake is well risen, has begun to shrink away from the sides of the tin and has turned a golden-brown colour.
  • Set aside to cool for ten minutes then remove from the tin and leave to cool on a wire rack.
  • To decorate, melt the remaining chocolate in a heatproof bowl over a saucepan of simmering water.
  • Mary recommends spooning the chocolate into a piping  bag and piping zig-zags across the top of the loaf. This is a little too prim for my style so I decided to drizzle it haphazardly instead. 
  • Now, all you have to do is slice and serve.

This is a cake I would urge everyone to try. It's sweet but not too indulgent, making it perfect for a cold January afternoon. Go on. Have a slice!


I think Mary Berry would be proud of my cake. What do you reckon?

Tuesday, November 15, 2011

My name is Sharon and I believe in cake

I'm a life-long believer in the power of cake. A slice of cake, with or without cream or ice cream, always makes me feel better, no matter what the situation.

If you stop to think about it, you'll realise that there's a cake for every occasion. There are birthday cakes with their crowns of flickering candles. There are show-stopper cakes that serve as grand finales at special dinner parties. And there are cakes for days like today, days that are crisp with the onset of winter and that seem made for the indulgence of afternoon tea.


Cakes like this French apple cake which is bursting with seasonal flavour. Its comforting sweetness is balanced by the slight sourness of the Bramley apples and the gentle spice of the nutmeg. I can't think of a better cake to accompany a cup of tea on an afternoon in November.


Here's what you need to make this cake:


First layer:
450g/1lb Bramley apples or other cooking apples, peeled and cored
115g/4oz/1 cup self-raising flour

5ml/1tsp baking powder

115g caster sugar

90ml/6tbsp milk

50g/2oz/4 tbsp butter, melted

2 eggs

5ml/1tsp fresh nutmeg, grated


Second layer:
75g/3oz/6tbsp butter, at room temperature 

115g/4oz/a half cup caster sugar

5ml/1tsp vanilla essence 

1 egg


Method:

  • Preheat the oven to 160 C/325 F/Gas 3.
  • Grease and line the base of a 23cm/9in round cake tin

  • Weigh your ingredients and chop your apples into chunks. Lay them on the bottom of the lined tin.

  • Put all of the remaining ingredients for the first layer of your cake into a bowl or food processor and beat to a smooth batter.
  • Pour the batter over the apples in the tin and level the top with a spoon.
  • Bake in the oven for 35 to 40 minutes, until the top has become golden.
  • Meanwhile, cream the ingredients for the second layer together.  
  • Remove the cake from the oven and spoon over the creamed mixture.
  • Return to the oven and bake for another 20 to 25 minutes until the top is golden brown.
  • Allow the cake to cool in the tin and when it's ready to eat, you'll have all you need for the perfect afternoon tea. A soft luscious layer of apple sponge topped with a crispy layer that has become deliciously chewy around the edges.
  • Serve with cream, ice cream or even just a cup of tea. Sit back and savour what might just be a perfect moment.

This cake keeps well for a few days; its sponge layer becoming denser and more custard like while its top layer retains that sugary crunch. Yum!

Thursday, June 9, 2011

Cake banishes all woes

Life has been difficult lately. Like many others here in Ireland, my boyfriend and I have started to worry about money. Our incomes have fallen as prices have risen and we can't help but feel anxious about paying our ever escalating bills.

It's hard to stay positive when faced with money worries. It's hard to stay open to the many possibilities of life when you're focussing on how you're going to pay the mortgage...

There's one thing that always helps me when I find myself overwhelmed by worry, one thing that can always be relied upon to banish all anxious thoughts and instantly make me feel better.

Can you guess that that one thing is? If you know me at all, you are sure to guess correctly. It simply has to be cake.

I found the recipe for these 'Summer Bakewells' in this week's Sunday Times Style section. Created by London's wonderfully-named Lily Vanilli, their sweet citrus-infused pastry, melt-in-the-mouth frangipane and smoooth vanilla buttercream instantly banished all thoughts of woe.

Here are the ingredients and instructions for making 12 of these lovelies. (Don't be put off by how long the list looks: these are actually easy to make.)

For the pastry:
250g flour, plus extra for dusting
50g icing sugar
125g cold butter, cut into cubes
1 large egg, beaten
Zest of 1 orange
A splash of milk

For the coulis:
200g frozen mixed berries
50g caster sugar
50ml water

For the frangipane:
85g unsalted butter at room temperature
85g golden caster sugar
85g ground almonds
Zest of 1 oraange
1 egg

For the vanilla buttercream:
55g unsalted butter at room temperature
250 icing sugar
4 tbsp ground almonds
125ml double cream
1/2 tsp vanilla extract

Toasted flaked almonds and berries to decorate


  • Make the pastry. I made mine in a food processor, combining the sugar and the flour, whizzing in the butter, adding the egg and the zest and then the milk until I had a dough. If you don't have a food processor, all you have to do is sieve the flour and sugar into a bowl and rub in the butter until you get a fine, crumb-like mixture. Add the egg, zest and milk and work it into a ball.


  • Flour the ball lightly. Wrap it in clingfilm and refridgerate for 30 mins.


  • Make the coulis by placing the fruit, sugar and water in a heavy-bottomed pan. Bring it to the boil, stirring continously. Reduce the heat and simmer until it has thickened. Leave to cool.


  • Make the frangipane by beating all of the ingredients together until they are smooth. Spoon into a piping bag. (Don't worry if you don't have one. You can also use a spoon.)


  • Make the buttercream by beating the butter for 5 mins. Add the sugar, ground almonds and half the cream and beat slowly until incorporated. Add the rest of the cream graduallly and finally add the vanilla extract to taste. Beat well for 3 mins or so or until smooth and light.


  • Heat the oven to 190C/Gas Mark 5/370F.


  • Roll out the pastry and cut into rounds to fit a cupcake pan. Press into place. (As you can see, my attempt was a bit of a patchwork affair.)


  • Spoon in some coulis.


  • Pipe in the frangipane (spoon it in if you don't have a piping bag).


  • Top with flaked almonds and bake for 25 to 30 mins.


  • Allow to cool then pipe with the buttercream and top with the berry of your choice.


  • Regulars at Dingle Farmers' Market: I'll be tweaking this recipe a little and these cakes will be making an appearance on my stall. This means that you too will be able to banish your woes while indulging in decadent cakes!

    Monday, September 13, 2010

    Sharon is exceptional.

    I don't mean to boast but I finally have categorical proof of just how exceptional I am. Unfortunately, I am loathe to admit that I am exceptional in an undesirable way. I appear to be exceptionally sensitive to pain, especially to the sharp jab of pain caused by the prick of a needle.
    I've always hated needles - and by extension doctors, dentists and even sewing - but it was only when I tried acupuncture for the first time last week that I realised my aversion to them was based on something real.

    "This won't hurt at all," promised the acupuncturist as he inserted a needle into the top of my head last Friday. "Very few people have many nerve endings here."
    "Ouch", said Sharon, wincing.
    "Oh," said the acupuncturist. "You are exceptional."

    There we have it. Proof positive of just how extraordinary I am.

    After two acupuncture sessions (which left me with actual bruises but also resulted in my arm ,which has been experiencing unexplained muscle spasms for the past six weeks, feeling dramatically better), I felt as though I needed some consolation, as well as a celebration.
    So, I baked this:

    This was one of those rich and aromatic flourless types of chocolate cakes that you can almost hear melting in your mouth. (I found it in Nigella Lawson's Nigella Bites cookbook.)

    Ingredients:

    250g dark chocolate (minimum 70% cocoa solids) 125g unsalted butter (softened)
    6 eggs (2 whole, 4 separated)
    175g caster sugar
    2 tbsp Cointreau (optional but how could you resist?)
    Grated zest of 1 orange (optional and ditto)

    Cream topping:
    250ml double cream (Nigella recommends 500ml but this is too much for me)
    1 tsp vanilla extract
    1 tbsp Cointreau (optional)
    1/2 tbsp cocoa powder for dusting

    Prep:
    • Preheat the oven to 180 degrees/gas mark 4.
    • Line the bottom of a 23cm springform baking tin with baking parchment.
    • Melt the chocolate (I usually do this in the microwave or you can use a double boiler*).
    • Add the butter and let it melt in the warm chocolate.
    • Beat the two whole eggs and four egg yolks with 75g of the caster sugar.
    • Add the chocolate mixture, Cointreau and orange zest.

    • In another bowl, whisk the four egg whites until foamy, then gradually add the remaining 100g of caster sugar and whisk until the whites are holding their shape but are not too stiff.
    • Lighten the chocolate mixture with a dollop of the whites and then fold in the rest.
    • Pour into the tin and bake for 35 to 40 minutes or until the cake is risen and cracked and its centre is no longer wobbly.
    • Cool the cake in its tin on a wire rack. And don't panic when the middle begins to sink. This is supposed to happen!
    • When the cake has cooled, place the tin on a plate or cake stand and carefully remove it. Don't worry about cracks or rough edges. If anything, they will convince sceptics you've made the cake yourself!
    • Whip the cream until it is soft and add the vanilla and Cointreau (if using).
    • Fill the crater of the cake with the cream and dust the top with cocoa powder.
    • Dig in.
    * Be careful when microwaving chocolate. I usually microwave it for 1 minute and for 10 second intervals after that. It's easy to burn it and it's tragic to waste chocolate.